Sharing our food successes and failures, new recipes and old favorites
...and throwing in some great money-saving deals here and there!

Showing posts with label Dessert. Show all posts

Friday, February 10, 2012

Preschool Snack - Part 2

After pretzels and apples on Monday, and S'mores Trail Mix on Wednesday, we decided to make dirt dessert pudding cups for preschool snack on Friday. This was another easy one to make and Linds and Luke helped throughout the entire process. The end result was delicious and after we set aside enough for her class, there were three left. I thought this was perfect since the boy doesn't really do desserts (especially one this juvenile!)...but lo and behold, when I pulled them out last night for dessert, his eyes lit up and he exclaimed, "oh, YES, I love dirt dessert!" Needless to say, I shared half of my pudding cup with my grateful husband :) Lucky for us, too, there were four sent home from school today - so we each got our own tonight.

We garnished ours with a single gummy worm on top (mostly because I managed to eat the rest of the gummy worms over the course of the week we had them in the house and didn't have any extras to mix in with the batter - totally the baby's fault?!). The pudding cups taste much better after sitting overnight in the fridge, but can always be eaten pretty much immediately after making, too.

Dirt Dessert
Ingredients
1 (3.9 oz) package instant chocolate pudding
2 cups cold milk
1 (8 oz) tub whipped topping
15 Oreo cookies finely crushed
Gummy worms

Directions
  1. Beat pudding mix and milk in a large bowl with wire whisk for 2 minutes.
  2. Let stand 5 minutes.
  3. Mix in whipped topping and 1/2 cup of cookie crumbs.
  4. Spoon into ten 6 or 7 oz cups and top with remaining crumbs.
  5. Refrigerate for an hour and top with gummy worms before serving.

Our doubled batch for her class:

Tuesday, December 6, 2011

Toffee Millionaires

The annual MOMS Club cookie exchange was on Sunday, and although I haven't done a whole heck of a lot with the club recently, this was the perfect opportunity to 1) catch up with old friends, and 2) get a nice big variety of cookies to eat (and guiltlessly, thanks to the baby on the way!). The festivities did not disappoint - nor did the cookies ;-)

Last year I made some pretty kick ass rum balls and wanted to bring something equally delicious this year. While chatting with the boy's family over Thanksgiving, someone mentioned the toffee millionaires that my brother-in-law made last year. They were a huge hit and I vaguely remember eating one (or five or six...hmmmm?) over Christmas and loving them. The more I thought about them, the stronger the craving, and I decided those were it. Making them in such a large number (I needed about 6 dozen) was a VERY time-consuming process, but so very worth it! If you're looking for some "salty-sweet goodness" (thanks, Sarah, for the description), then add these to your cookie list.

Toffee Millionaires
Ingredients
1 cup (2 sticks) unsalted butter, softened, plus more for pan
2 cups all-purpose flour
1 1/4 teaspoons coarse salt
3/4 cup packed light-brown sugar
1 cup finely chopped chocolate-covered toffee bars plus 1/2 cup coarsely chopped chocolate-covered toffee bars (about 10 ounces total)
1/4 cup heavy cream

Directions
  1. Preheat oven to 300 degrees, with rack in upper third. Butter an 8-inch square baking pan. 
  2. Whisk to combine flour and salt into a bowl.
  3. In a separate bowl, beat butter with an electric mixer on medium-high until creamy, 2 to 3 minutes. Gradually add brown sugar; beat until fluffy, about 2 minutes more. Reduce speed to low. Add flour mixture; mix just until combined. 
  4. Using plastic wrap, press dough into prepared pan. With plastic on dough, chill 45 minutes.
  5. Pierce dough all over with a wooden skewer. Bake, rotating pan halfway through, until golden brown and center is firm, about 70 minutes. Transfer to a wire rack; let cool 10 minutes.
  6. Meanwhile, heat finely chopped toffee bars and cream in a saucepan, stirring constantly, over medium-low heat until smooth. 
  7. Pour over shortbread in pan; sprinkle with coarsely chopped toffee. Let cool slightly. Cut into squares. Let cool completely.

Tuesday, September 6, 2011

Crack Pie

They call this crack pie for a reason - I'm pretty sure this is to a food junkie like myself what crack is to a drug junkie ;-) It's highly addictive and one piece is definitely not enough!

I found this recipe featured in Bon Appétit in last year's September issue. I was intrigued (mostly because of the name!) and stuck it in my collection. I have avoided making pies, cookies, cakes, etc. recently because I'm usually the only one in the house who ends up eating it, but when I was in charge of dessert for the boy's family's Labor Day picnic, I thought I'd give it a shot. The name rang true - everyone seemed to like the salty-sweet pie and I had just one little sliver left by the end of the day. I'd definitely make this one again!

Crack Pie
Ingredients
Oat Cookie Crust
T (1 stick plus 1 T) unsalted room temperature, divided
5.5 T packed brown sugar, divided
2 T sugar
1 large egg
3/4 cup plus 2 T old-fashioned oats
1/2 cup all purpose flour
1/8 tsp baking powder
1/8 tsp baking soda
1/4 teaspoon salt

Filling
3/4 cup sugar
1/2 cup packed brown sugar
1 T nonfat dry milk powder
1/4 tsp salt
1/2 cup unsalted butter, melted, cooled slightly
6.5 T heavy whipping cream
4 large egg yolks
1 tsp vanilla extract
Powdered sugar for dusting

Directions
  1. Preheat oven to 350. Line 13x9x2 baking pan with parchment paper; coat with nonstick spray. 
  2. Combine 6 T butter, 4 T brown sugar, and 2 T sugar in medium bowl. Using electric mixer, beat mixture until light and fluffy, occasionally scraping down sides of bowl, about 2 minutes.
  3. Add egg; beat until pale and fluffy. Add oats, flour, baking powder, baking soda, and salt and beat until well blended, about 1 minute.
  4. Turn oat mixture out onto prepared baking pan; press out evenly to edges of pan. Bake 17 to 18 minutes. Transfer baking pan to rack and cool cookie completely.
  5. Using hands, crumble oat cookie into large bowl; add 3 T butter and 1.5 T brown sugar. Rub in with fingertips until mixture is moist enough to stick together. 
  6. Transfer cookie crust mixture to 9-in diameter glass pie dish. Using fingers, press evenly onto bottom and up the sides. Place pie dish with crust on rimmed baking sheet.
  7. Position rack in center of oven and preheat to 350. Whisk both sugars, milk powder, and salt in medium bowl to blend. Add melted butter and whisk until blended. Add cream, then egg yolks, and vanilla and whisk until well blended.
  8. Pour filling into crust and bake pie 30 minutes (filling may begin to bubble).
  9. Reduce oven temperature to 325 and continue to bake until filling is brown in spots and set around the edges. Center will still move slightly when the dish is gently shaken - about 20 minutes longer.
  10. Cool pie 2 hours in pie dish on rack. Chill uncovered overnight. Can be made 2 days ahead.
  11. Before serving, sift powdered sugar lightly over top of pie. Serve cold.

Zucchini Brownies

These sound bizarre - believe me, I know. I needed to bring dessert to the boy's family's annual Labor Day gathering and I've been itching to make this one recipe I found in Bon Appétit (crack pie - look for that post after this one). I had no idea how the pie would turn out, so I thought I'd bring brownies as a safe bet back-up (and it was kid-friendly for the 6 little ones we had there). When I opened up my fridge and saw mounds of zucchini and (of course!) no eggs, I remembered seeing this recipe and figured I'd try it out. What are the odds of a double dessert failure?!

Luckily, the brownies were a HUGE hit. Even my father-in-law, who hates zucchini and isn't a big fan of chocolate, thought they were great. I definitely recommend them if your garden is overflowing with zuchs! The icing is what really makes them perfect (alone the brownie was just a tiny bit bland).

Zucchini Brownies
Ingredients
1/2 cup vegetable oil
1 1/2 cups white sugar
2 teaspoons vanilla extract
2 cups all-purpose flour
1/2 cup unsweetened cocoa powder
1 1/2 teaspoons baking soda
1 teaspoon salt
2 cups shredded zucchini
6 tablespoons unsweetened cocoa powder
1/4 cup margarine
2 cups confectioners' sugar
1/4 cup milk
1/2 teaspoon vanilla extract

Directions
  1. Preheat oven to 350 degrees F (175 degrees C). Grease and flour a 9x13 inch baking pan. I like to use cocoa powder to flour the pan so the brownies don't have white powder all over the bottom.
  2. In a large bowl, mix together the oil, sugar and 2 teaspoons vanilla until well blended. Combine the flour, 1/2 cup cocoa, baking soda and salt; stir into the sugar mixture. Fold in the zucchini. Spread evenly into the prepared pan.
  3. Bake for 25 to 30 minutes in the preheated oven, until brownies spring back when gently touched. 
  4. To make the frosting, melt together the 6 tablespoons of cocoa and margarine; set aside to cool. In a medium bowl, blend together the confectioners' sugar, milk and 1/2 teaspoon vanilla. Stir in the cocoa mixture. Spread over cooled brownies before cutting into squares.

Thursday, June 16, 2011

Oreo Pudding Pie

I forgot to add this to the ziti post, so I figured I'd do it separately! This was what I sent over with the ziti, garlic crescent rolls and salad. It was DELISH (I didn't get a full piece, but I sure did lick the bowl ;-) hehe).

Oreo Pudding Pie
Ingredients
2 pkg. (3.4 oz. each)JELL-O OREO Flavor Instant Pudding
2-1/2 cups cold milk
1 tub (8 oz.)COOL WHIP Whipped Topping, thawed, divided
1 OREO Pie Crust (6 oz.)
5 OREO Cookies, cut in half

Directions
  1. Beat pudding mixes and milk with whisk 2 min. 
  2. Stir in half the COOL WHIP and pour into crust. 
  3. Refrigerate 4 hours or until firm. 
  4. Top with remaining COOL WHIP and cookies just before serving.

Wednesday, May 25, 2011

May 25 - Apple Pie!

So today is my little man's birthday...he's already two years old! I can't believe how quickly these two years have gone...I can still remember him curled up in my lap, nursing away when he was a teeny tiny little guy (well, he was 14 lbs. by 8 weeks, so maybe not that teeny tiny?! but definitely smaller!). I can't post about him without including a few of my favorite photos :)

Birth:

1 month:

Almost 6 months:

1st birthday:

2nd birthday:

When I asked him what he wanted for his birthday surprise (cake, ice cream, pie, brownies, cookies, etc.), he screamed "pie!" Now, when I was a kid, I asked for my mom's apple pie from scratch every single year. It was tradition for as long as I can remember. When Luke said pie, I was SO excited to continue the tradition! Linds and I wrapped presents and then around 8:30 last night we started the pie. I completely forgot how long the process was! The crust alone took a good 20 minutes, the peeling, coring and slicing up the apples took awhile, and then it's a 45 minute bake time. Whew! It was all worth it though because that pie tasted AMAZING!

Apple Pie
Crust Ingredients:
1 & 1/4 cup flour
1/2 tsp salt
1/3 cup shortening

Filling Ingredients:
3/4 cup sugar
1/4 cup flour
1/2 tsp nutmeg
1/2 tsp cinnamon
dash of salt
6 apples (skinned/sliced)

Topping Ingredients:
1 cup flour
1/2 cup margarine
1/2 cup brown sugar

Directions
Crust:
Mix flour and salt. Add 1/3 cup shortening. Mix with hands and 3 or 4 T of cold water until forms into ball. Roll out on floured surface. Form into baking dish.

Filling:
Combine powdered ingredients and add apples to mix. Put in crust.

Topping:
Turn into crumb by playing with it. Top pie with mixture and bake for 45 minutes at 425 degrees.


Sunday, December 19, 2010

Pecan Pie

We had the boy's extended family Christmas party tonight at his uncle's house and had so much fun! We usually get together once or twice a year (Thanksgiving and Christmas) for a big family event, and since we were with my fam on Thanksgiving this year, we were due for a gathering. It's always fun catching up with everyone and seeing what everyone's up to...although sometimes it can be depressing when you see how much the kids have grown up?!? Linds was particularly social today, playing with some of the boy's cousins' kids, and when I finally figured out who the one girl was, I was floored. This kid went from being 3 years old to 10 overnight! I really swore it was yesterday she was this little girl that was Lindsay's age and now she's this grown "tween." I never thought I'd be 28 and saying I feel old, but when I see these kids and how they've grown over the past 10 years, it *really* makes me feel ancient.

But, back to the whole point of the post, we were asked to bring dessert. I'm over Christmas cookies (the exchange and subsequent selection of 18 different cookies did me in), and we just had cake for Lindsay's birthday, so I figured I'd do a pie. My fabulous friend, Kristi Hall, makes a kick ass pecan pie, so I stole her recipe and made that. It turned out really well from what people said...I didn't even take a piece for myself (again, so not in the mood for sweets at this point!). I forgot to take a picture, so you're stuck with just the recipe :P

Pecan Pie
Ingredients
3 eggs
1 cup light brown sugar
1 cup light corn syrup
2 tbsp. butter, melted
1 tsp vanilla
1 cup fresh pecans
Pie crust (I just used the graham cracker one - it's easiest)

Directions
  1. Preheat oven to 350.
  2. Combine eggs, brown sugar, corn syrup, butter and vanilla until blended.
  3. Pour into pie crust and top with pecans.
  4. Bake 50-55 minutes.

Sunday, December 12, 2010

Rum Balls

A dear, dear friend of mine (who happens to be a drinking buddy) nicknamed me "boozy cubes" awhile back. At first, I wasn't sure whether to be offended, complimented, or find a placement in the in-between gray area, but after thinking about it, I embraced my alcohol-y  nature and decided it was a good fit! Plus, Sarah (the BC-nickname originator) is a superb friend who would only leave the best compliments for me ;-)

In keeping up with tradition of my booze-loving nature, I decided to make rum balls for our MOMS Club cookies exchange. I was trying to decide what to make last week (looking for a super-easy, super-quick recipe since trying to do those in conjunction with Lindsay's party was going to be craaaaaazy). They were up my alley - chocolate, liquored up, and simple! - so I gave them a whirl.

Now, I had partied Friday AND Saturday night, so by the time Sunday rolled around, i was NOT looking for any booze to creep into my diet. I took a little nibble of the rum balls and maybe it was my poor, pathetic liver screaming, "HELP!" but I could have sworn they were a shot in a cookie. I took them trepidatiously, hoping not to offend anyone with their awfully liquored nature, but to my surprise, everyone was surprisingly accepting. No one felt they had any overly-boozey aftertaste. I was SHOCKED! They were delicious, but I seriously thought they were way too rummy.

Since we got the okay from several parties, I'll post the recipe. I thought they were delish...just had a potent rum taste to them! So, if you partake, be forewarned and enjoy :)

Rum Balls
Ingredients

Vegetable oil cooking spray
3/4 cup (1 1/2 sticks) unsalted butter, cut into pieces
6 ounces semisweet chocolate, finely chopped
3 large eggs
1/2 cup packed light-brown sugar
1 teaspoon pure vanilla extract
1/2 teaspoon coarse salt
3/4 cup all-purpose flour
1/4 cup plus 2 tablespoons dark rum
Coarse sanding sugar, for rolling

Directions
  1. Preheat oven to 350. Coat a 12-by-17-inch rimmed baking sheet with cooking spray; set aside. Melt butter and chocolate in a small heatproof bowl set over a pan of simmering water, stirring occasionally. Set aside.
  2. Whisk together eggs, brown sugar, vanilla, and salt in a large bowl. Stir in chocolate mixture, then fold in flour. Pour batter into prepared baking sheet. Spread evenly with a rubber spatula. Bake until top is shiny and a cake tester inserted into center comes out with some crumbs attached, about 10 minutes. Let cool completely on a wire rack.
  3. Break up brownie into small pieces; transfer to the bowl of an electric mixer fitted with the paddle attachment. With machine on low speed, pour in rum, and mix until crumbs start to come together to form a ball.
  4. Shape into 1-inch balls, and roll in sanding sugar to coat. Transfer to a baking sheet; refrigerate, uncovered, until cold, about 2 hours. Serve chilled or at room temperature. Rum balls can be refrigerated in an airtight container up to 1 week.
Read more at Marthastewart.com: Rum Balls - Martha Stewart Recipes

Wednesday, September 22, 2010

September Munchin Mamas!

Thursday is September's Munchin' Mamas meeting - woot, woot! I loooove these get-togethers because I always leave with a full belly, tons of delicious leftovers, and recipes to add to my collection. This month's theme is "30-minute meals" since school has started and we all need as much time as we can get outside of the kitchen. I'm making one of my favorite quick meals - mixed-up enchiladas! It's so easy to make and tastes sooooo delicious. Make sure to serve it up over rice.

Mixed-up Enchiladas
Ingredients
1 - 2 lbs. ground beef
1/2 small onion
Salt, pepper, garlic powder to taste
1 can enchilada sauce
1 small can chopped green chilies
1 can cream of mushroom soup
10 corn tortillas, crushed
1 - 2 cups cheddar cheese
Rice

Directions
  1. Brown ground beef. Add salt, pepper and garlic powder to taste.
  2. When complete, add green chilies, enchilada sauce and cream of mushroom soup. Mix well.
  3. Add corn tortillas, cover and simmer 10 minutes.
  4. Cover with cheese and let melt.
  5. Serve after a few minutes over rice.

I also whipped up a quick dessert of Rice Krispie treats because I had some of the cereal to use up. I told Linds we were making them and she asked if we could make them a special color. Last time I made them we did green ones (remember this post?), but today she requested pink. So without further ado - our pink Rice Krispies treats!

Rice Krispies Treats
Ingredients
3 tablespoons butter
10 oz. bag mini-marshmallows
6 cups Rice Krispies
12 drops red food coloring
4 drops blue food coloring

Directions
  1. Melt butter on low in large saucepan.
  2. Once melted, pour in marshmallows; add food coloring once marshmallows are creamy.
  3. Mix in Rice Krispies.
  4. Spread into a greased 9 x 13 pan/baking dish. Use wax paper to flatten top.
  5. Let cool for about an hour.

Tuesday, July 20, 2010

Cinnamon Rolls

My friend, Barbara, is quite pregnant with her third boy (God bless her!) and was craving some cinnamon rolls - here's my recipe for the homemade ones I made awhile back for a Munchin' Mamas meeting. My goodness they are AMAZING! You do need a breadmaker for this recipe, although I'm sure it would be easy to adapt it.

Cinnabon Clones
Ingredients

Cinnamon Roll Dough
1 cup warm milk
2 eggs, room temperature
1/3 cup margarine, melted
4 1/2 cups bread flour
1 teaspoon salt
1/2 cup white sugar
2 1/2 teaspoons bread machine yeast

Cinnamon Mixture
1 cup brown sugar, packed
2 1/2 tablespoons ground cinnamon
1/3 cup butter, softened

Icing
1 (3 ounce) package cream cheese, softened
1/4 cup butter, softened
1 1/2 cups confectioners' sugar
1/2 teaspoon vanilla extract
1/8 teaspoon salt

Directions
  1. Place ingredients in the pan of the bread machine in the order recommended by the manufacturer. Select dough cycle; press Start.
  2. After the dough has doubled in size turn it out onto a lightly floured surface, cover and let rest for 10 minutes. 
  3. In a small bowl, combine brown sugar and cinnamon.
  4. Roll dough into a 16x21 inch rectangle. 
  5. Spread dough with 1/3 cup butter and sprinkle evenly with sugar/cinnamon mixture. 
  6. Roll up dough and cut into 12 rolls. 
  7. Place rolls in a lightly greased 9x13 inch baking pan. Cover and let rise until nearly doubled, about 30 minutes. Meanwhile, preheat oven to 400 degrees F (200 degrees C).
  8. Bake rolls in preheated oven until golden brown, about 15 minutes. 
  9. While rolls are baking, beat together cream cheese, 1/4 cup butter, confectioners' sugar, vanilla extract and salt. Spread frosting on warm rolls before serving

Monday, June 14, 2010

June 10 - The Whip

My birthday is on Tuesday, so on Friday, a group of friends and I headed to this great little English Pub tucked away on the outskirts of Coatesville for an early celebration. They serve a huge array of beer, but are also a BYO for other types of liquor, so we were all able to enjoy our beverages of choice. It was so nice getting out of the house, eating on the outdoor patio, with a bunch of adults and NO HIGHCHAIRS!

Since we were at a pub, I figured I needed to go authentic and ordered the fish and chips (yummmm!). I also grabbed a bite of Christy's onion soup which as phenomenal. Afterwards, Sarah produced the most decadent chocolate cake I've ever seen in my life (courtesy Wegmans) and we came back to my place to eat it. It was almost a sin to cut into it, but oh my gosh, BEST.CAKE.EVER. I finished it yesterday (so much for the diet).

Tuesday, May 25, 2010

May 25 - Birthday Pizza!

Today is Luke's birthday, so we let him pick dinner...okay, okay - we don't have any food, the kid digs pizza, and we haven't had it in a couple of weeks, so it was a no-brainer. We ordered from Domino's and Linds and I made a cake for Luke. I'm definitely not good at making cakes...no matter how hard I try, they always look like a HUGE disaster! Luckily, Linds helped me with this, so I can lay partial blame on her ;-) Here's our creation:
Now, when we gave him the cake, he poked it a few times and then just screamed - no tears...just piercing shrieks. I don't think he liked it?! He refused to even touch it. Oh, well, we'll see what happens during his party on Sunday! Today, we spent the afternoon at Chick-fil-A with Luke's buddies, took long naps, and went to the "slides and swings" (East Fallowfield Park) behind our house. It was such a fun day! Here are a few photos of the birthday boy.

Monday, April 12, 2010

Apr. 12 - Corn Chowder & Bread

There was a bit of a dichotomy in tonight's dinner - half was really, really successful, while the other was a food FAIL. In the end, it wasn't too big of a deal, but still, I hate when my dishes get screwed up!

The success was the corn chowder - it was creamier and tasted a lot better than how I remembered it. I didn't have green pepper, so I used red pepper, and I amped up the amount of veggies to make it heartier. The entire pot is roughly 825 calories, and the boy and I each ate about 1/3 (Linds ate half of the rest and I put the other half in the fridge for tomorrow's lunch). Even with the extra ingredients and larger serving size, it was still about 275 calories for the entire bowl.
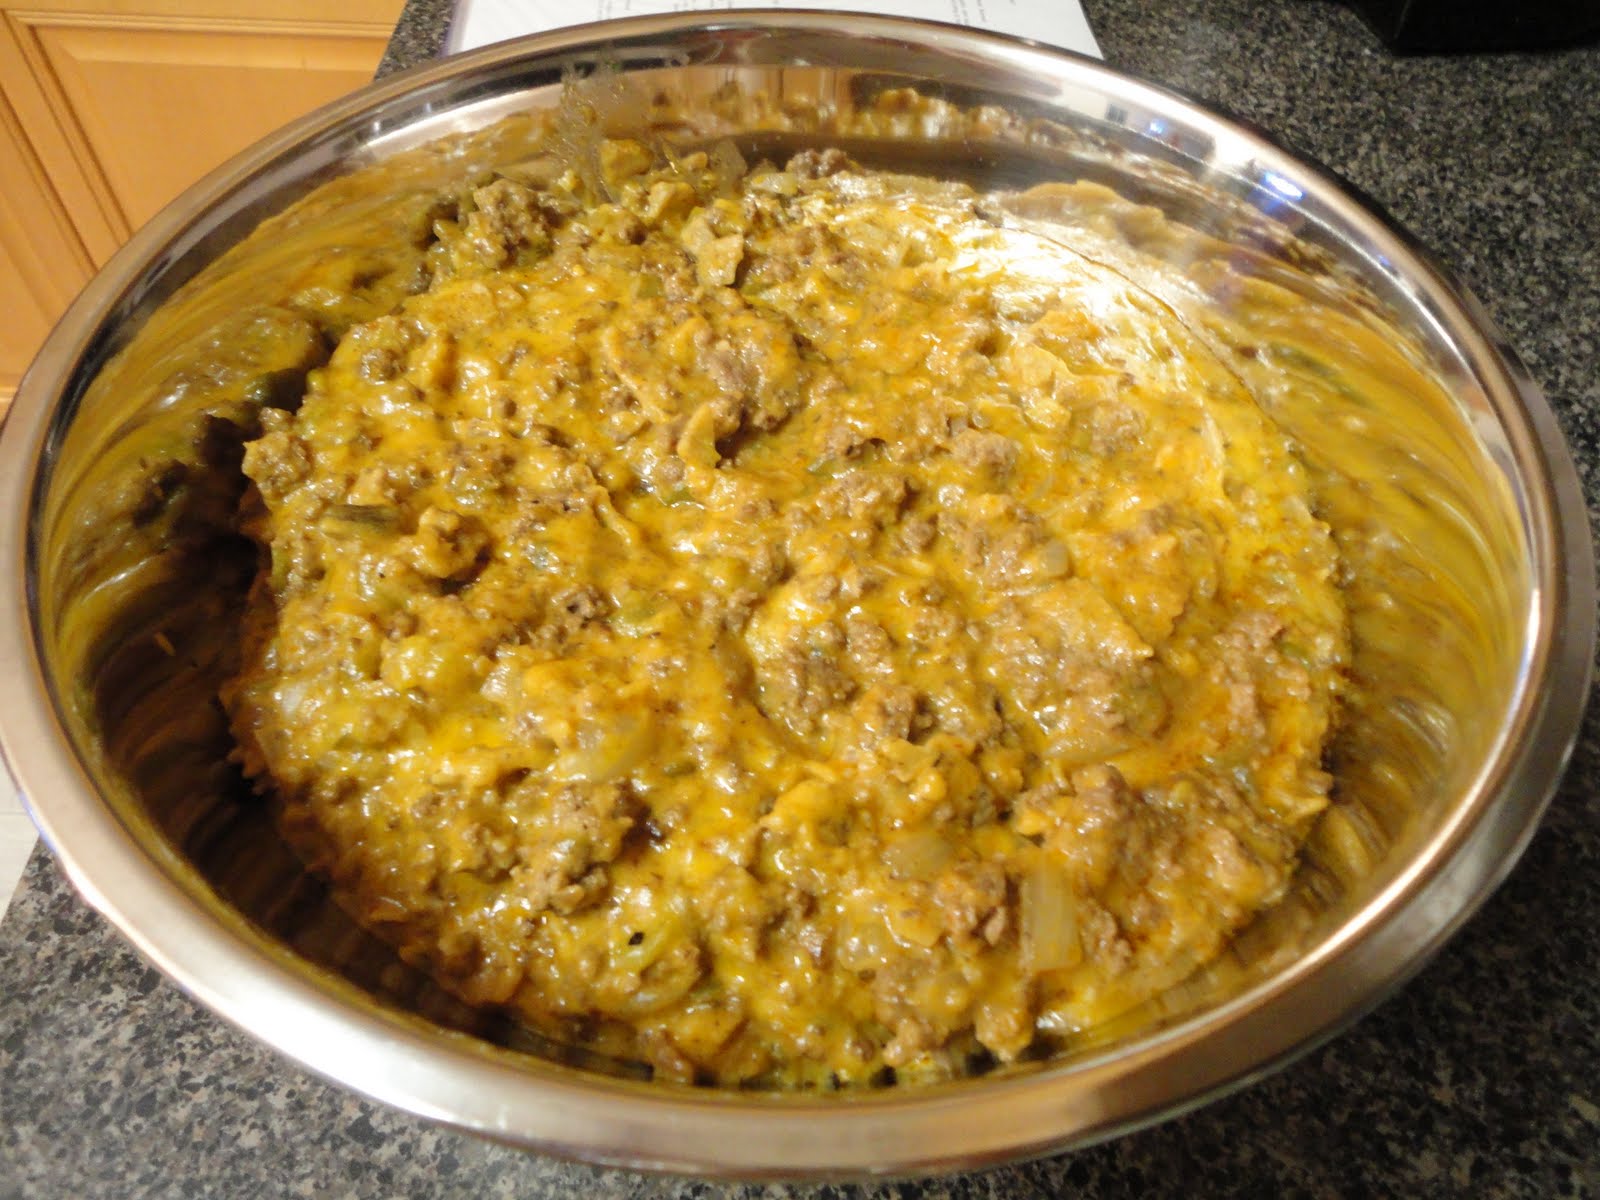
The fail? Well, that would be my beer-cheese bread. I was pumped about that one because it was so great last time, but I knew even while it was baking that something was wrong. The top of the loaf never rose - it was kind of sunken in. When I took it out, there was about 1/2 - 1 cup of the flour loose on the bottom. For some reason it never fully mixed. I need to troubleshoot and see what went wrong because every so often that happens when I make bread. Also, the mixer knob thing was stuck in the bread (that happens every time I make bread, too). The bread was too doughy and moist and tasted way too strongly of beer (you'd think that I would have liked that, huh?!). Oh, well, saves the calories, right?
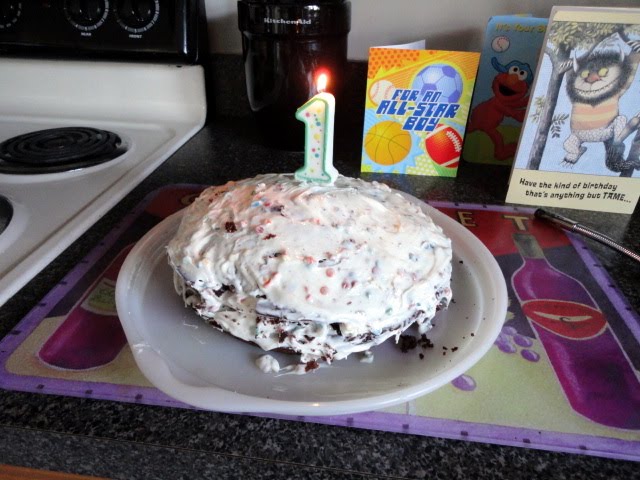
I also decided to get fancy and made dessert for Miss L and me. I found blackberry gelatin when I was grocery shopping last time, so I made some of that and topped it with light Cool Whip. Another low-cal, yet delicious, complement to the meal!

Corn Chowder
Ingredients
1 tablespoon olive oil
1/4 cup finely diced celery
1 small finely diced onion
1/4 cup finely diced red pepper
2 cups frozen whole kernel corn
2 medium potatoes peeled, diced, into 1/2" cubes
1 cup water 1/4 teaspoon salt
black pepper to taste
1/4 teaspoon paprika
2 tablespoons flour
2 cups low-fat (1%) or skim milk

Directions
  1.  Heat oil in medium saucepan. 
  2. Add celery, onion, and red pepper and saute for 2 minutes. 
  3. Add corn, potatoes, water, salt, pepper, and paprika. Bring to a boil; reduce heat to medium; and cook, covered, about 10 minutes or until potatoes are tender. 
  4. Place 1/2 cup milk in a jar with tight fitting lid. Add flour and shake vigorously. Add gradually to cooked vegetables and add remaining milk. 
  5. Cook, stirring constantly, until mixture comes to a boil and thickens.
Beer Cheese Bread
Ingredients
1 package yeast
3 cups bread flour
1 tablespoon sugar
1 1/2 teaspoons salt
1 tablespoon butter
10 ounces beer, flat
4 ounces extra sharp cheese, shredded
4 ounces Jack cheese, cut in 1/4" cubes

Directions
  1. Warm beer and American cheese over low heat on top of stove or in microwave. Cheese doesn't need to melt completely. Stir. 
  2. Add all ingredients in the order listed. 
  3. Use basic bread cycle for 1.5 lb. loaf.

Saturday, March 27, 2010

Brie Recipes

We're going out to dinner tonight, so I won't have any fun recipes to share for dinner. Instead, I figured I'd do a "theme" morning and post a couple Brie cheese recipes that are very tasty. I don't have any photos, but trust me, these are fantastic!

Baked Brie
Ingredients
Wedge of creamy Brie
Jam of choice
Tube of refrigerated crescent dough

Directions
  1. Line a baking pan with 3/4 of the crescent dough.
  2. Break up wedge of brie into smaller chunks and place on top.
  3. Cover with half a jar of jam.
  4. Piece the remaining dough on top.  
  5. Cook on 350 approx 20 minutes or until light golden brown.

Candied Brie Dip
Ingredients
8 oz of Brie
1/3 cup candied pecans (i used crushed regular pecans)
1/3 cup dried cranberries

Directions
  1. Place brie in 2 qt crockpot and cover with pecans and cranberries. 
  2. Cook for two hours or until brie is gooey all the way through. 
  3. Serve with cracker and sliced apples.

Tuesday, March 16, 2010

Mar. 16 - Spaghetti Pie

It was absolutely gorgeous today - low 60s, bright sunshine - the perfect pre-spring afternoon! We spent a good chunk of the day outside, Linds playing with her Cozy Coupe, trike, "purple car," ball, etc. and Luke and I sitting on the blanket reading books and playing toys. The sunlight was perfect for some great shots- they aren't food photos, but I think they're cute :)
But, anyways, since we were out there past 6:00, I needed a quick dinner to throw together. I figured a spaghetti pie would be perfect - used up the rest of the ricotta that needed to go, was quick to make and was light enough for this type of day. At only 325 calories/serving, it was a good addition to my already high-calorie day (darn yummy lunch).

Spaghetti Pie
Ingredients
4 oz. uncooked spaghetti
1 cup garden-style spaghetti sauce
1 cup reduced-fat ricotta cheese
3 egg whites
1/3 cup Parmesan cheese
1/4 cup mozzarella cheese

Directions
  1. Cook spaghetti according to package directions.
  2. In a small bowl, combine ricotta cheese and 1 egg white; set aside.
  3. Drain spaghetti; add Parmesan cheese and remaining egg whites.
  4. Press onto the bottom and up the side of a 9-in deep dish pie plate coated with nonstick cooking spray.
  5. Spoon ricotta mixture into crust. Top with spaghetti sauce.
  6. Bake uncovered at 350 for 20 minutes.
  7. Sprinkle with mozzarella cheese. Bake 5 minutes longer or until cheese is melted and filling is heated through.
  8. Let stand for 5 minutes before slicing. 
 Yields 4 servings.

Thursday, March 4, 2010

Coconut-Pistachio Pie

We had our 2nd meeting of the Munchin' Mamas today (more recipes to follow!) and our theme this month was "green" - the interpretation was up to us (the food could be green, it could be organic, served in a green dish, etc.). I had a recipe for a coconut-pistachio pie that I've wanted to try out for so long, but no one in my house besides me will eat either of the main ingredients except me, so I used this as my opportunity to give it a whirl.

The hardest part about making this was toasting the coconut - and that was pretty easy! The rest was a snap - and boy did it taste great.

Coconut-Pistachio Pie
Ingredients
2 1/2 cups lightly toasted coconut flakes
1/3 cup butter
2 cups cold milk
2 packages (3.4 ounces each) pistachio pudding mix
1 cup whipped topping
2 T chopped pistachios

Directions
  1. In a small bowl, combine coconut and butter. Press onto the bottom and up the sides of a greased 9-in pie plate. Refrigerate at least 30 minutes or until firm. 
  2. In a small bowl, whisk milk and pudding mixes for 2 minutes. 
  3. Spread 1½ cups over crust. 
  4. Fold whipped topping into remaining pudding; spread over pie. 
  5. Sprinkle with pistachios. 
  6. Cover and refrigerate for at least 2 hours.

    Thursday, February 25, 2010

    Brickle Drop Cookies

    We're heading toward yet another snow storm and are stranded, car-less, at home. After putting Luke down for a nap, I figured we might as well bake some cookies or else we'll head into our gazillionth game of Memory. I'm so tired of chocolate chip, peanut butter, oatmeal, etc. and when I was at the grocery store yesterday, I came across some Heath Bits O' Brickle Toffee Bits, which are absolutely delightful little mix-ins for cookies. I wound up using the recipe on the back of the bag for Brickle Drop Cookies. I love me some toffee, and how could toffee cookies not be great?! They turned out perfectly (I can attest to that by the 3 or 4 I've eaten already today). Here's how the kitchen looked after Lindsay and I created our masterpieces:
     The mess was worth it, though - here's the recipe!

    Brickle Drop Cookies
    Ingredients
    1 cup (2 sticks) butter or margarine, softened
    1 cup granulated sugar
    1 cup packed light brown sugar
    1 teaspoon vanilla extract
    1/2 teaspoon salt
    3 eggs
    3-1/2 cups all-purpose flour
    2 teaspoons baking soda
    2 teaspoons cream of tartar
    1-1/3 cups (8 oz. pkg.) HEATH BITS 'O BRICKLE Toffee Bits

    Directions:
    1. Heat oven to 350°F. Lightly grease cookie sheet.
    2. Beat butter, granulated sugar, brown sugar, vanilla and salt in large bowl until blended. Add eggs; beat well. Stir together flour, baking soda and cream of tartar; gradually add to butter mixture, beating until blended. Stir in brickle. Drop by heaping teaspoons onto prepared cookie sheet.
    3. Bake 8 to 10 minutes or until lightly browned. (Took mine more like 13 minutes.) Cool slightly. 
    Yield: about 6 dozen cookies.

     From Hershey's Kitchens.

    Tuesday, February 23, 2010

    Chocoholism

    After working in Hershey for nearly six years straight, I pretty much lost all taste for chocolate. I wasn't much of a fan to begin with, but after six years of picking at the bin of reject chocolate in the break room of Chocolate World, forget about it. I couldn't stand another taste.

    Well, that was up until I was pregnant with Luke. Since then, I've been a chocoholic. I'm pretty picky, though, about the kind I eat...and coincidentally, I prefer Hershey's. But, my mama took a trip to Altoona to meet my aunt a few weeks ago and brought me back the BEST present ever: Mallo Cups!! The sweet marshmallow center, with the crispy coconutty chocolate shell is, without a doubt, my favorite candy. Hands down. They aren't easy to find (although I have seen them in some Wawas!), but I found them through Amazon in bulk - and am damn tempted to order some more. They're only 60-ish calories a cup, too, so it's a perfect dessert - enough to quell the sweet tooth, but not laden with calories.

    My other chocolate obsession includes these two Hershey kisses: mint truffles (of which I bought two bags back in December and have rationed myself so that I can still enjoy some now) and Irish cream (I have to beg, borrow and steal these from Sarah!). I can't even begin to explain the rich, creamy goodness that these embody without sounding pathetic, so I'll leave it up to your imaginations. I'm also dorky enough to seek out the different types of limited edition kisses that Hershey has put out before and was shocked at all the different kinds! I bolded the ones I would seriously give my left arm for. Go ahead and make fun...but if you do, let me know which ones YOU want to try!

    * New York Style Cheesecake
    * Orange Creme
    * Vanilla Creme
    * Lemon Creme
    * Coconut Creme
    * TRIO (dark, milk and white chocolates in one Kiss)
    * Chocolate Marshmallow
    * Cookies 'n' Creme (has little nonpareil bits - not the same as the European ones, they have little Oreo bits)
    * Vanilla Yogurt Creme (not to be confused with the Vanilla Creme)
    * Chocolate Truffle
    * Mint Truffle
    * Special Dark Strawberry
    * Champagne Truffle
    * Neapolitan (chocolate, vanilla and strawberry flavors)
    * Milk Chocolate Filled with Marshmallow Creme
    * Caramel Apple
    * Candy Corn
    * Pumpkin Spice
    * Hot Cocoa Creme
    * Candy Cane (Peppermint)
    * Chocolate Mint
    * Dark Raspberry
    * Milk Chocolate Filled with Strawberry Creme
    * Chocolate Meltaway (Milk Chocolate with velvety smooth chocolate center)
    * Irish Creme (milk chocolate filled with irish creme)
    * Buttered Cream
    * Espresso

    Monday, February 15, 2010

    Feb. 15 - Baked Ziti (again!)

    We just had some ziti casserole last weekend, but one of the mamas in the club had a baby and I signed up to deliver her a meal (a few days late because of the snow, but at least we finally got it to her!). It's the same recipe as before, but I'll post it again. I made some of the Pillsbury garlic crescent rolls and salad to go with it, and some of the brownies from scratch for dessert!

    Baked Ziti
    Ingredients
    1 lb ziti noodles
    1 lb ground sausage
    1/2 lb ground beef
    3 cups mozzarella cheese
    3 cups marinara/spaghetti sauce
    1/4 cup Parmesan cheese

    Directions
    1. Preheat oven to 375 F.
    2. Cook ziti in boiling water; drain.
    3. Brown meats; drain off fat.
    4. In a large baking dish, layer ziti, meat, cheese and sauce; repeat until everything has been used.
    5. Top with Parmesan cheese.
    6. Bake about 30 - 40 minutes until bubbly.

    Best Brownies
    Ingredients
    1/2 cup butter (1 stick)
    1 cup white sugar
    2 eggs
    1 teaspoon vanilla extract
    1/3 cup unsweetened cocoa powder
    1/2 cup flour
    1/4 teaspoon salt
    1/4 teaspoon baking powder

    Directions
    1. Preheat oven to 350 degrees. Grease an 8 x 8 pan. If you use a glass dish, turn heat down by 25 degrees and bake a few minutes longer.
    2. In a large saucepan, melt butter. Remove from heat and stir in sugar, eggs, vanilla extract, cocoa powder, flour, salt and baking powder. Use a wooden spoon to mix and do NOT use a blender (they won't be as fudge-y if you blend).
    3. Bake in preheated oven for about 30-35 minutes, making sure not to over cook.

    Friday, February 12, 2010

    Feb. 12 - Valerie's Chicken

    When I was a kid, we had some family friends who made this chicken during a get-together and we all loved the recipe. Instead of calling it by name, my mom called it, "Valerie's Chicken" so we would remember which chicken recipe it was. The name stuck and now we only refer to it as Valerie's Chicken. It's super easy to make (with only six ingredients, how could it not be?!?), takes only about 30 minutes, and is delicious over pasta or rice. It calls for cream of mushroom soup, and although the boy and my mom detest "fungus," they love the recipe - it's not at all a strong mushroom flavor.

    Tonight, we paired it with pasta (the boy's preference) and had a side of peas with it. Linds loves this chicken and even proclaimed, "this is the best dinner ever!"

    Valerie's Chicken
    Ingredients
    2 boneless chicken breasts
    2 tablespoons butter
    1 tablespoon Italian seasoning
    3 oz. cream cheese
    1 can cream of mushroom soup
    1/4 cup of cooking sherry/white wine

    Directions
    1. Melt butter in pan over medium heat.
    2. Brown chicken breasts; season with Italian seasoning.
    3. Simmer 10 minutes.
    4. Combine cream cheese, soup and wine and pour over chicken. 
    5. Let simmer for 20 minutes.
    The recipe originally calls for 4 chicken breasts, but I find there isn't enough sauce if you do that many. If you need to do 4 pieces of chicken, DEFINITELY double the sauce (6 oz. cream cheese, 2 cans soup, 1/2 cup wine). Give it a shot with pasta and rice - I like it both ways!
    Related Posts with Thumbnails